Happy Holidays to all of you and a Wonderful New Year to come…
2014 Happy Holiday Cards


Wonderfully creative scrapebooking, cards, embellishments, and media art
09 Dec 2014 Leave a comment
Happy Holidays to all of you and a Wonderful New Year to come…
2014 Happy Holiday Cards
09 Dec 2014 Leave a comment

Hello, Friend
Supplies:
Stamp BBY900
White card stock for A2 card base
White card stock for stamped image
Grey card stock for border of stamped image and phrase
Pattern paper cut to: 4″ x 5 1/4″
Die cut word/phrase of your choice
Two pearls
Large die and word or phrase die
Stickles (Star Dust)
Copics:
Polar Bear W1: Nose N3: & Ear RV10.
Dog: Eye & Harness B93; Body E30 & E33; Ears RV10.
Instructions:
Adhere pattern paper to card base.
Stamp and color image on white card stock, run through die cutter.
Lay in color of the dog by using E30, then highlight/color over using E33.
Run grey card stock through die cutter, using large die cut, then the phrase.
Cut the grey pieces to the back of the white card stock, stamped image, to create the illusion of a border and adhere both to card base.
Place a pearl at both sides, as shown.
Adhere die cut phrase.
Add stickles for snowdrifts, is desired.
09 Dec 2014 Leave a comment
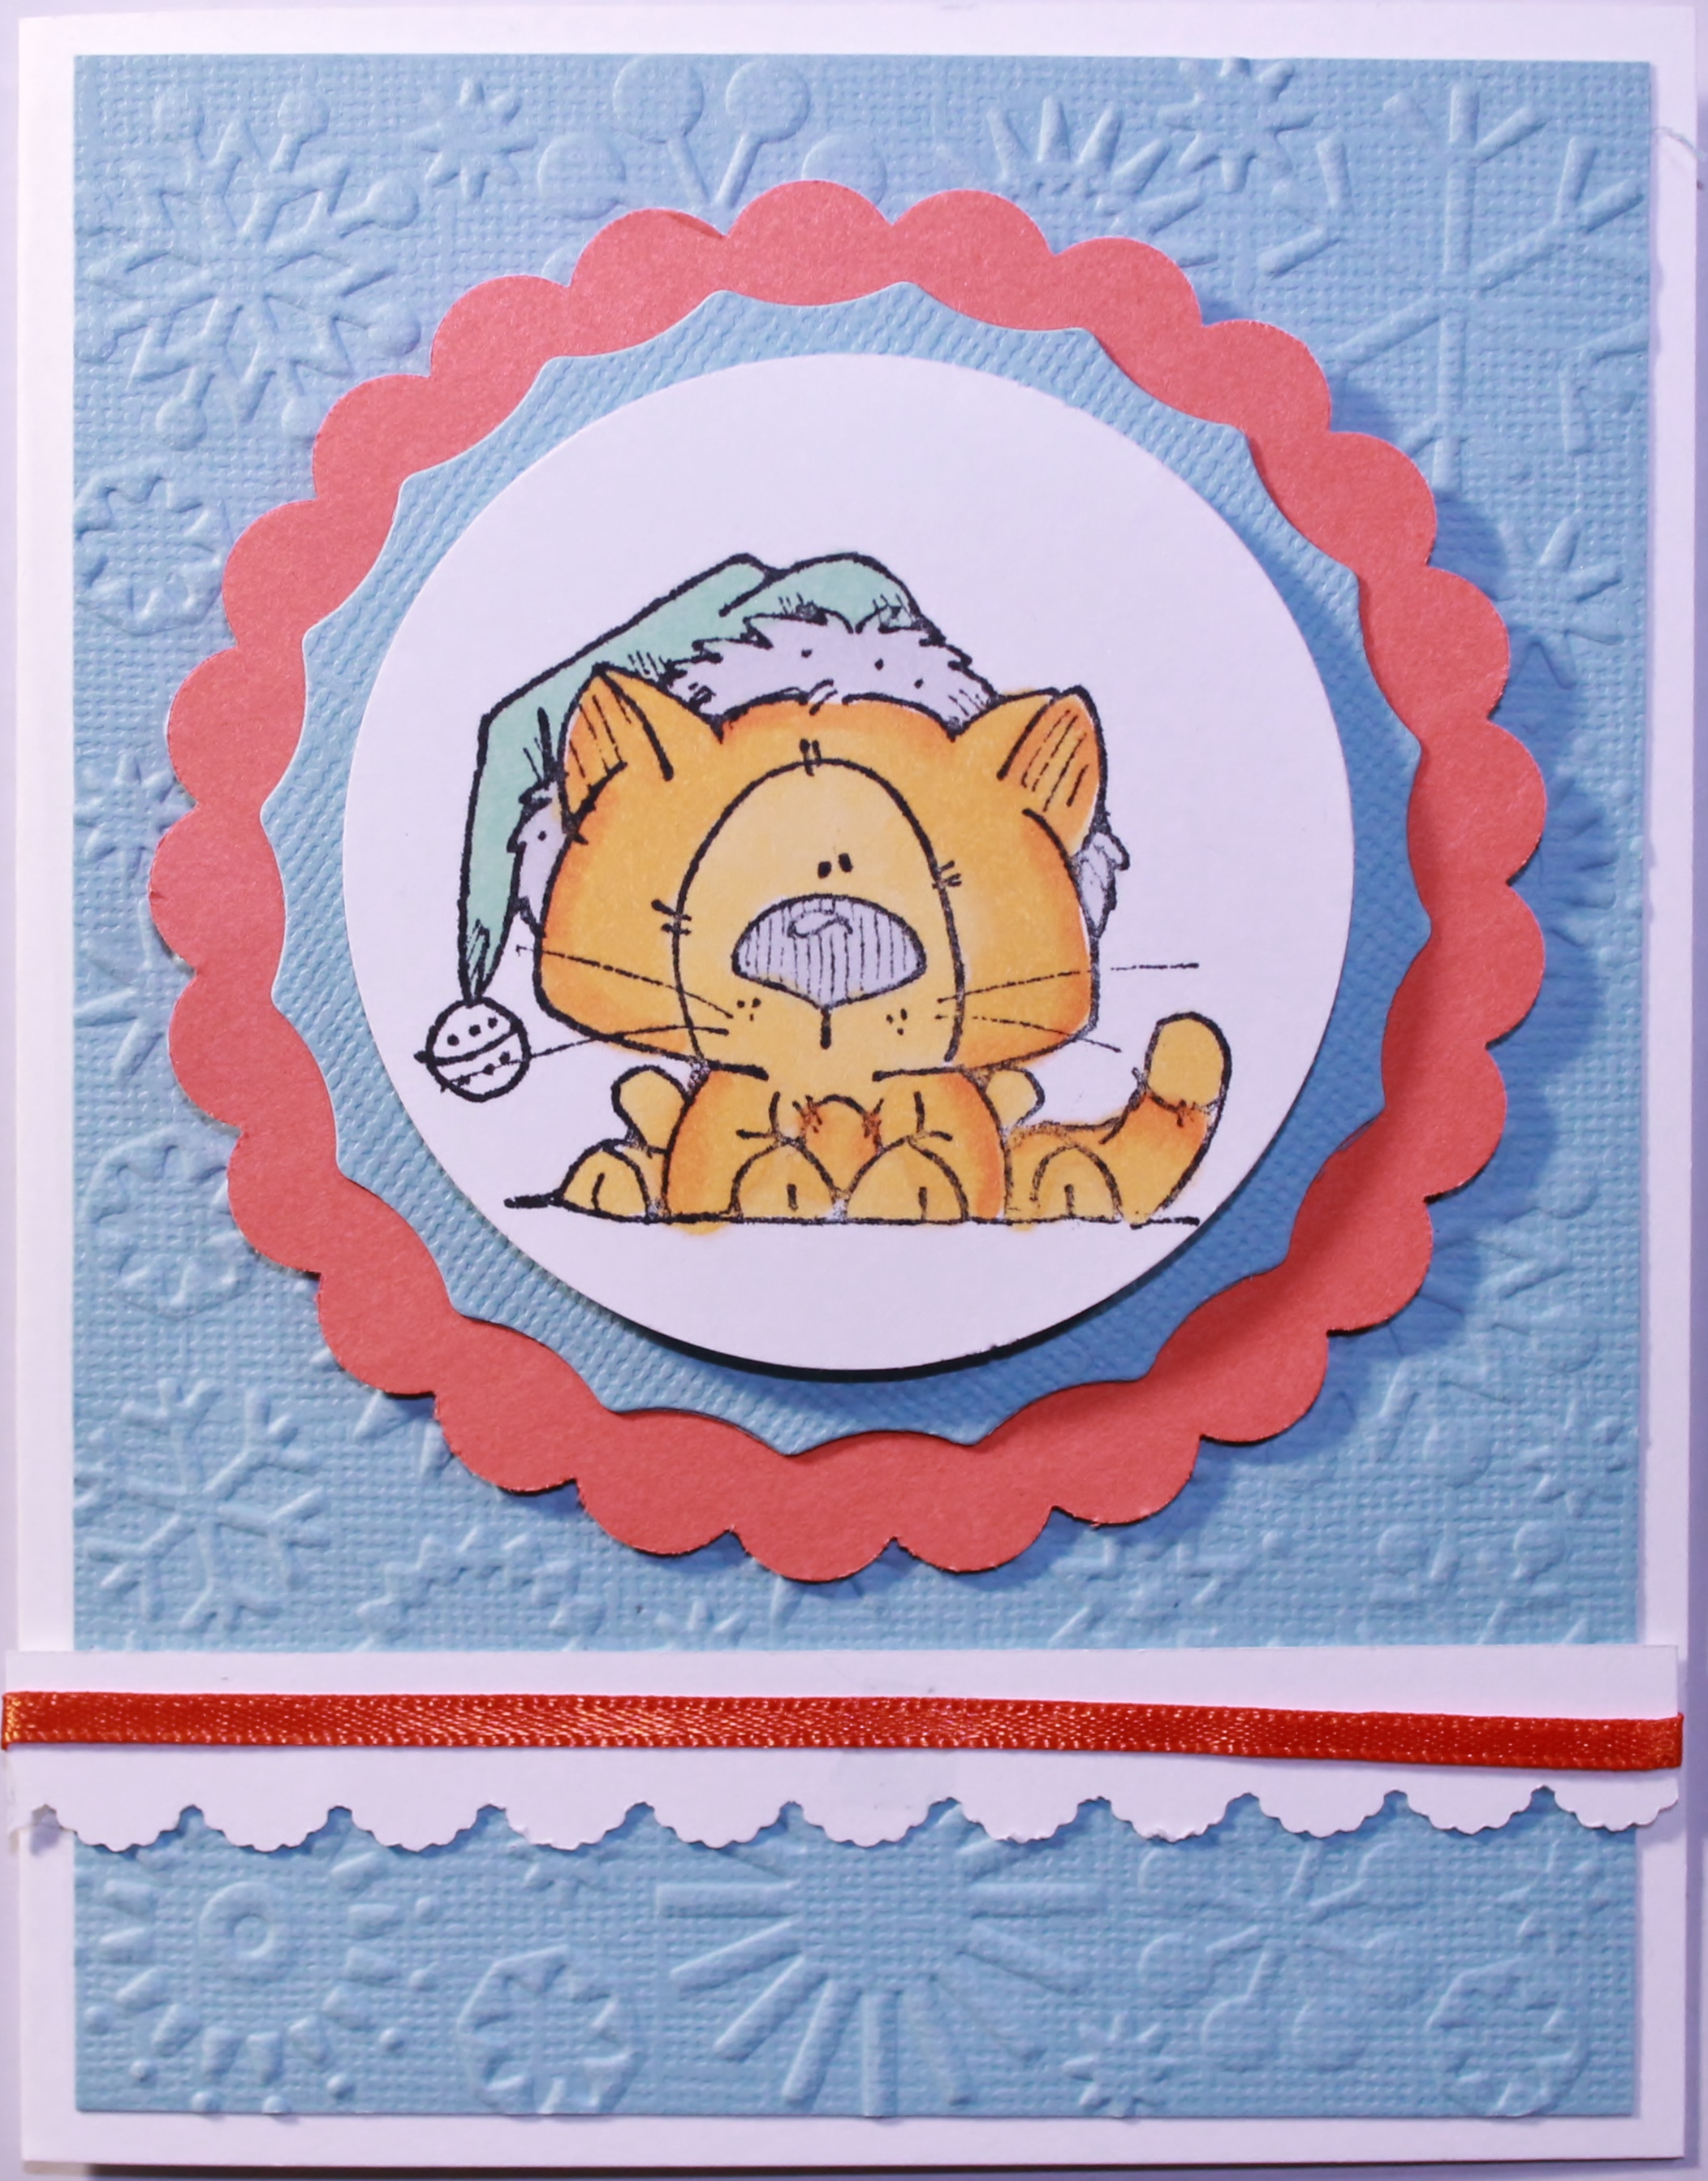
Santa Sanders
Supplies:
Stamp EY853
A2 card base
Light blue card stock cut to 4″ x 5 1/4″
Snowflake embossing folder
white card stock, punched border
Orange scalloped punched piece (3 1/2″)
Light blue reversed scallop punched piece (3″)
White card stock punched (2 1/2″) for stamped image
Black ink pad
Foam tape
Orange mini ribbon, approx. 18″
White thread (to tie snowflake charm)
Snowflake charm
Copic Markers:
N0 for the ground
Santa Hat; B10 or B70
Paws and Face; Y23
Body and Head; Y38
Chest; YR21
Cat Nose and Ears; R01
Instructions:
Run light blue large piece through Cuttlebug/Big Shot, using the snowflake embossing folder.
Punch white strip and adhere ribbon to it, adhere to embossed piece, adhere all to the base, where shown.
Stamp image, color, adhere all three circles, as shown, then adhere all, using foam tape, to upper section of the embossed piece, as shown.
Complete with bowed ribbon and trim off excess.
Tie thread through charm and wrap around bow making a knot, letting charm slightly hang.
09 Dec 2014 Leave a comment

Floating By Card
Supplies:
Stamp BY817
A2 card base
Red card stock cut to: 4″ x 5 1/4″ and 2 1/4″ x 4 1/2″
Pattern paper cut to 3 3/4″ x 5″
White card stock (for stamped image) cut to 2″ x 4 1/4″
White card stock 4 1/4″ x 5″ (for tearing to make snowy hills)
Three strips of patterns paper cut to various lengths with notch cutes for banners
Turquoise gem
Glitter Glue
Black ink pad
Foam tape
Copics:
Scarf: Y19; R29; E13; BG01 &; YG63
Hat: R29 & Y19
Penguin body: N2 & N4
Snowflake:B00
Instructions:
Layer card base: base, large red card stock, pattern pater.
Tear larges white card stock to make three hills, layer at the bottom of card, making various slopes.
Cut notches in three strips, adhere two next to each other, add the third strip, using foam tape, where shown.
Stamp and color image and layer white piece to red piece, adhere all to card, where shown.
Carefully add glitter glue to hills and snowflake.
Add gem in the center of the snowflake.
Set aside to dry.
| mahubs893eab9471 on Candy Cane Decor | |
| mahubs893eab9471 on Candy Cane Decor | |
| Toby G on You Rock Birthday Card | |
| simplycraftydesigns on Hill Blossoms Pretty Blue… | |
| mahubs893eab9471 on Hill Blossoms Pretty Blue… |

Recent Comments